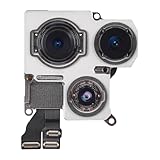
Why Do My iPhone Videos Look Blurry? The Truth & Fixes
Ever feel like you’re filming a Bigfoot sighting instead of your kid’s birthday? You whip out your shiny iPhone, tap record, and… blur city. It’s frustrating, I know. I’ve been there. You excitedly show off your new video only to have the recipient squint, cock their head, and ask, “What *is* that?”
It’s not just you. This has happened to me more times than I care to admit. The worst was capturing my niece’s first steps, only to realize later the video looked like a watercolor painting. I replayed the moment in my head for weeks. The crisp, clean image on the phone screen had vanished in the final product. So, why do my iphone videos look blurry?
There are several reasons, and most of them have easy fixes. Some are due to settings, others to physical factors, and a few are just plain old user error (guilty!). So, let’s dive in.
The Camera’s Secret Enemy: Light
First, let’s talk about light. Or, more accurately, the lack of it. iPhones, like all cameras, *need* light. Without adequate light, the camera has to compensate, usually by increasing the ISO or slowing the shutter speed. These adjustments can introduce noise and blur, respectively.
Think of it like this: Imagine trying to paint in a dimly lit room. You’d struggle to see the details, and your brushstrokes would be shaky. The iPhone’s camera faces the same struggle. Low light conditions force the camera to work harder, and the results often suffer. I’ve seen some great shots in dimly lit restaurants, but the majority of them looked like they were taken with a potato.
One of the first things to consider when you take a video is the lighting.
The Great Debate: Auto vs. Manual Settings
Now, let’s address the settings. iPhones, bless their hearts, are designed to be user-friendly. That means a lot of things are automated. While this can be convenient, it can also be a source of blurry videos. Your iPhone has different settings, and the default ones may not be optimal for every situation.
I get it: nobody wants to fiddle with dials and settings before catching a fleeting moment. But sometimes, you have to. Auto mode is generally fine for well-lit environments, but it can struggle in tricky situations. The iPhone is often trying to balance several things at once: ISO, shutter speed, and aperture. If any of these are misaligned, things can get blurry.
It’s like trying to juggle chainsaws. You might get away with it for a bit, but sooner or later, something’s going to go wrong.
Consider the settings of the camera. The frame rate, resolution, and HDR (High Dynamic Range) video can all play a role in the final quality of your videos. Frame rate, for instance, affects the smoothness of your video. Resolution dictates the detail. HDR improves the dynamic range, making your video look more vibrant. These settings are a rabbit hole, but changing them can greatly improve your video’s clarity. (See Also: What Is Ae Af Lock On Iphone Camera 2 )
We’ll cover some of the specific settings to adjust in a later section.
Clean Lens = Clear Videos
I know, I know. It sounds obvious. But how often do you actually clean your iPhone’s camera lens? I’m going to go out on a limb and say: not often enough. It’s right there, constantly exposed to the elements, pocket lint, and greasy fingerprints. A dirty lens is a guaranteed path to blurry videos.
I learned this the hard way during a family trip. I spent all afternoon filming the kids at the beach. Sun, sand, and sticky fingers? A disaster. The lens was covered in sand, which I didn’t notice until we were back at the hotel. Hours of footage ruined! I’d been so focused on capturing the moment that I completely forgot to check the lens. I felt like an idiot.
The solution is simple: wipe the lens. Use a microfiber cloth for the best results. A quick wipe before you film can make a huge difference. Don’t use your shirt. Trust me, it’s not ideal.
Stabilization: Your Video’s Best Friend
Handheld video can be shaky, and the more you zoom, the worse it gets. Apple has built-in image stabilization features. These features work to reduce camera shake and keep your videos steady, but they can’t perform miracles.
If you’re filming something that requires a lot of movement, you might need to use a tripod or gimbal. These devices provide more stability than your hands can. Even a simple phone stand can improve the stability of your shot, and can even change the perspective if you are tired of the same old angles.
The American Academy of Ophthalmology recommends that people with any vision problems take breaks while using phones to maintain visual sharpness, something that can also help with video quality.
Settings You Can Change to Reduce Blur
Okay, let’s get into the nitty-gritty. What settings can you tweak to improve your video quality? Here’s a breakdown of the most important ones:
- Resolution and Frame Rate: Go to Settings > Camera > Record Video. Choose the highest resolution and frame rate your iPhone supports. 4K at 60fps is generally the sweet spot, but if you need to conserve storage space, 1080p at 30fps is still a good option. However, 60fps at 1080p can give you more flexibility to slow down footage in editing.
- HDR Video: In the same Record Video settings, make sure HDR video is enabled. It improves the dynamic range of your videos, making them look more vibrant.
- Lock Camera: If you’re filming in a situation where the lighting is consistent, you can lock the camera’s focus and exposure. Tap and hold on the screen to lock focus.
- Check Storage Space: It may sound simple, but if you’re running low on storage, your iPhone may reduce the quality to save space.
The best settings depend on your needs. For everyday use, I typically recommend 4K at 30fps with HDR. For action shots or slow-motion videos, I’ll switch to 1080p at 60fps. The key is to experiment and find what works best for you. (See Also: What Does Live Do On Iphone Camera )
You can also use external apps. Apps like Filmic Pro give you more manual control over the camera settings, allowing you to control focus, exposure, and white balance.
The Impact of Zooming on Video Quality
Zooming in on your iPhone is convenient, but it can also hurt your video quality. The iPhone uses digital zoom, which crops the image and enlarges it. This results in a loss of detail and introduces blur. Optical zoom, which is found on some iPhones, is better because it uses the lens to zoom without losing quality.
Think of it like this: digital zoom is like blowing up a small photo. You can see more, but the image gets grainy. Optical zoom is like using a magnifying glass. The image gets bigger, but the quality stays the same. The difference is immediately apparent.
To get the best results, try to avoid zooming in on your iPhone unless you have optical zoom. Instead, move closer to your subject or consider using an external lens.
Why Does My iPhone Video Look Blurry When I Transfer It?
Sometimes, the problem isn’t the filming itself. It could be how you transfer the video. Compressing files during the transfer process can reduce quality. It’s the equivalent of making a copy of a copy, losing quality each time.
If you’re transferring videos wirelessly, make sure your Wi-Fi connection is strong. A weak signal can cause the iPhone to compress the video. Cloud storage services such as iCloud, Google Photos, or Dropbox also compress your videos to save space. Although this is convenient, it’s not ideal for maintaining the highest video quality.
For the best results, connect your iPhone directly to your computer using a cable and transfer the original files. This ensures you’re getting the best possible quality.
Troubleshooting Common Problems
Let’s address some of the common culprits behind blurry iPhone videos. Some problems are obvious, some not so much.
Say you’re on vacation and want to capture every sunset, every wave, every laugh. You come home, and the videos look bad. You’re probably going to be frustrated. (See Also: Why Are My Iphone Videos Upside Down )
So, here’s how to avoid it.
- Check Your Internet: If you’re uploading to the cloud, a slow internet connection can cause compression.
- Inspect the Lens: Fingerprints and smudges are the enemy. Give it a wipe.
- Review Your Settings: Are you shooting in the highest resolution and frame rate?
- Storage Space: If your iPhone is full, it may lower the quality automatically.
Comparing iPhone Video Quality
For years, Consumer Reports has tested smartphones, and they have consistently found that iPhones produce excellent video quality. But the quality depends on several factors, including the model and the settings used.
| Feature | Description | My Opinion |
|---|---|---|
| Resolution | Determines the level of detail in the video. | 4K resolution is the preferred setting. |
| Frame Rate | Affects the smoothness of the video. | 60fps is a good option for action, but 30fps is often sufficient. |
| Dynamic Range | Affects the contrast and color. | HDR video is highly recommended, making the videos more vibrant. |
| Stabilization | Reduces camera shake. | The built-in stabilization is good, but external gimbals are better. |
Faq: Answering Your Burning Questions
Why Are My iPhone Videos Blurry When I Zoom in?
As mentioned earlier, iPhones use digital zoom, which degrades quality. The image is simply cropped and enlarged, leading to a loss of detail and a blurry final product. If you need to zoom, either move closer to the subject or use a device that uses optical zoom. This allows you to zoom without losing quality.
Why Do My iPhone Videos Look Blurry When I Send Them to Someone?
When sharing videos, your iPhone may compress them to save bandwidth and reduce file size. This compression process can reduce video quality. If possible, send the original file via a file-sharing service. The recipient can then download the original video at full quality. Always ensure that the transfer method supports the original resolution of your video.
Why Do My iPhone Videos Look Blurry at Night?
Low light is the biggest culprit. Your iPhone is struggling to capture enough light in dark environments. To compensate, the camera increases ISO or slows the shutter speed, leading to noise or blur, respectively. Ensure proper lighting and use a tripod or gimbal for the steadiest shot. Consider the use of Night Mode, where the camera will take multiple photos and combine them, helping to capture more light.
How Can I Make My iPhone Videos Less Shaky?
iPhones have built-in image stabilization, but it can only do so much. To minimize shakiness, try holding your phone with both hands, using your elbows to stabilize against your body. For more dramatic results, invest in a tripod or a gimbal. These devices provide significantly improved stability and can make a huge difference in the final product. Make sure that you are using the stabilization settings to ensure they are on.
Final Thoughts
So, the next time you find yourself wondering why do my iphone videos look blurry, remember that the answer is rarely a single thing. It’s a combination of factors: lighting, settings, cleanliness, and how you transfer or share the video.
Go forth, wipe that lens, and start filming with confidence. And don’t be afraid to experiment with the settings. The only way to improve your video quality is to get out there and start filming.
- Why Don't My iPhone Photos Show Up on My Computer? The Real Fix
- Why Does iPhone Camera Make My Face Look Crooked? The Real Truth.
- How Do I See My iPhone Photos on Icloud: See iPhone Photos on...
- What Is Live Feature on iPhone Camera? The Real Deal.
- Why Are My iPhone Photos Not Loading? Fixes That Actually Work
The solution isn’t always obvious or easy. But with a little attention to detail, you can transform blurry footage into crisp, memorable moments.
Recommended Products
Recommended For You



![[Dual-Lens] Endoscope Camera with Light, 1920P HD Borescope with 8+1 Adjustable LED Lights, IP67 Waterproof 16.5FT Semi-Rigid Snake Cord Inspection Camera for iPhone, iPad and Android Phone (Type C)](https://m.media-amazon.com/images/I/41avH-scJML._SL160_.jpg)